The permanent Account Number or PAN Card is an alphanumeric code for eligible taxpayers to track down transactions. Usually, people register their phone number at the time of the Pan Card application so that they can get every notification that occurs by PAN Card.
According to the Income Tax Department of India website, Email Ids are not mandatory to obtain Pan Cards. However, it can bring new updates and notifications for the PAN Card application. Apart from that, Email IDs can help to receive electronic medium Pan Cards. Today we are here to cover the article with the steps for updating the Email Id in Pan Card online.
Steps to Update Email id in PAN Card Online
Looking for the methodology to update the Email Id in your PAN Card? Then you’ve come to the right place. Suppose you linked your mobile number with your PAN Card, and you get all the informative notifications at once, yet you want to make the documents permanent and secure them quite well in the mail. Thus, all you need to follow some simple steps to allow your Email Id to link with your PAN.
Step 1: In the beginning, you have to open your browser, whatever you feel comfortable using. Google Chrome is the most popular one. And search for Correction in PAN Card in the search bar. Visit the direct link from here https://www.onlineservices.nsdl.com/paam/endUserRegisterContact.html.
Here, you’ll see two different options for updating or correcting your PAN Card. One is from NSDL, and the other one is from UTIITSL. These two sites are from which you can apply for your PAN Card. So for updation or correction, you’ll have to use one of these sites.
Step 2: If your PAN Card is opened through the NSDL site, click on the NSDL site option, or if it’s the UTIITSL, select the same. Let’s choose the option NSDL here for today.
Once you open the NSDL site, you’ll see a page coming with a form to be filled out with the documents you used while applying for your PAN for the first time. Prudently write down all the required fields, but before that, go through the form gently so that you won’t make any mistakes filling the fields.
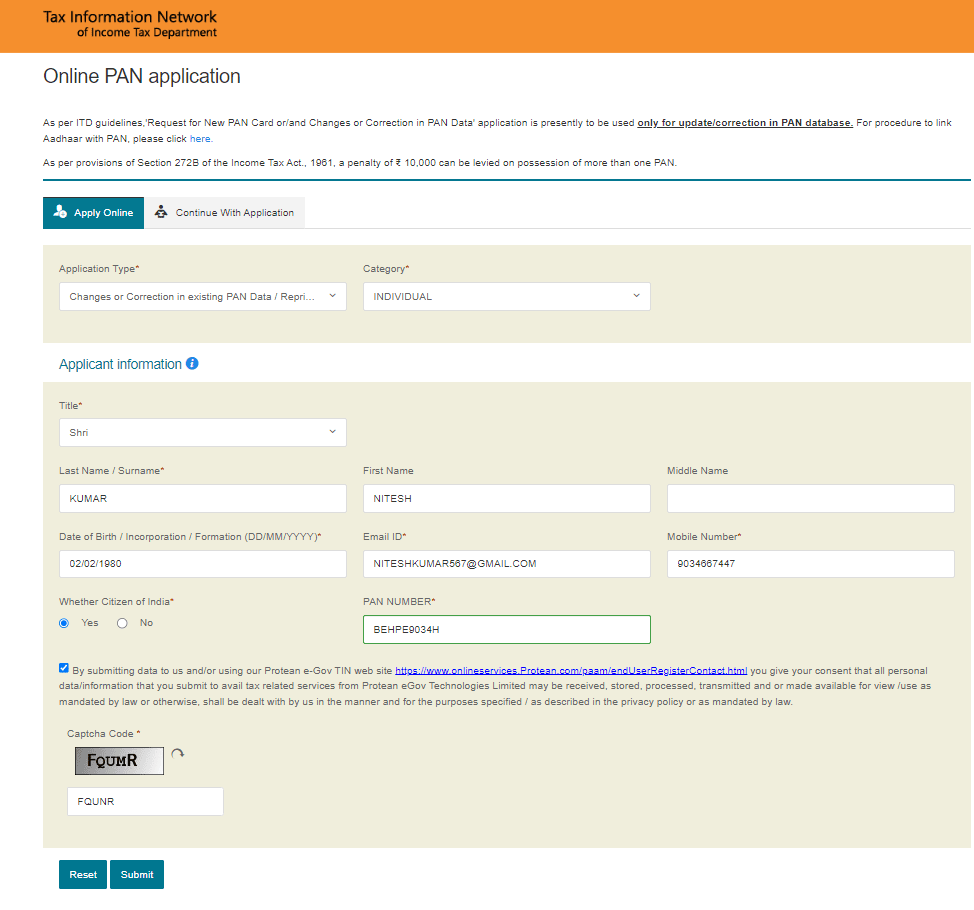
Step 3: After filling in all the fields, you’ll see the page asking for your nationalization. You have to click on Yes or No according to the nation you’re in. And then provide your PAN number in the given box beside. Click on the small box underneath that claims to have your consent about all the personal data you have given above for received, stored, processed, transmitted, or available for use or view.
Type the captcha given on the empty box below, and click on the Submit button.
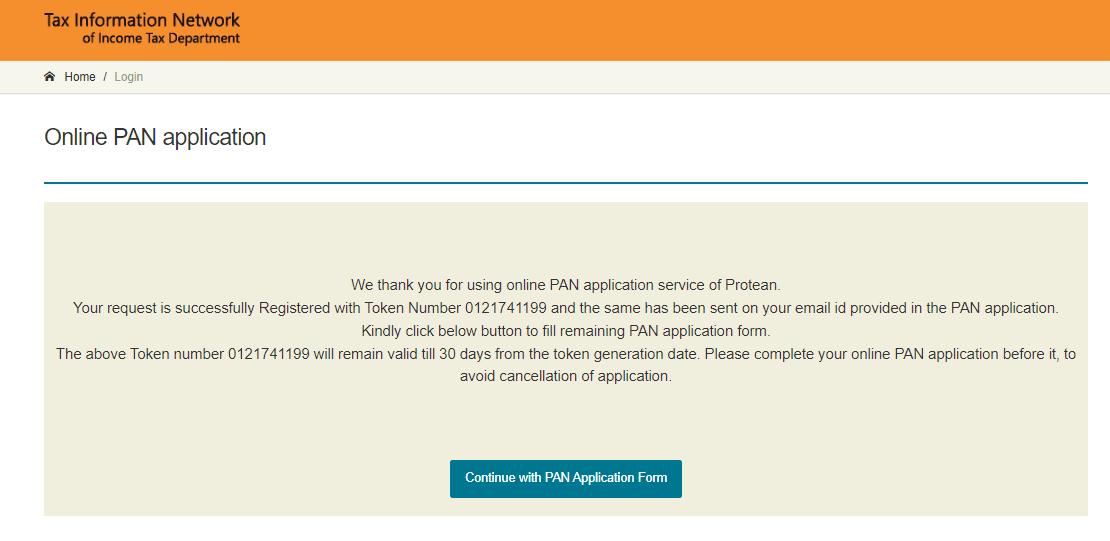
Step 4: Now, it will take you to a new page with your token number. You must write down the number to save it for future errors. Now, click on the Continue with PAN Application Form button, as you’re seeing.
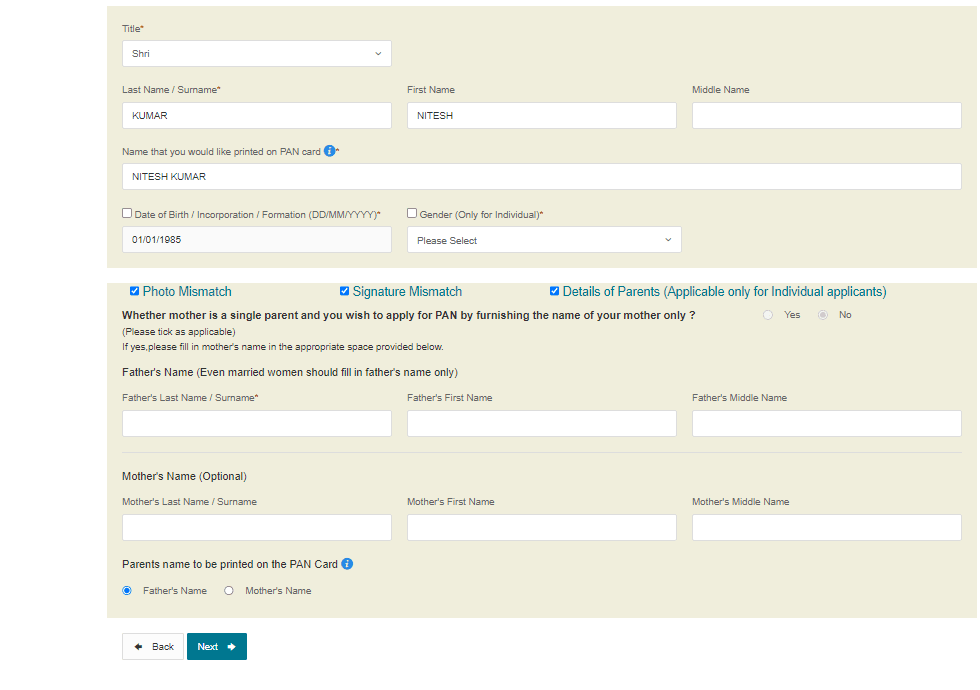
Step 5: The new interface will show you the 4 various methods of you being able to change or add your mobile number and email id. Here, you can select the option of paperless documents if you want to submit the application online and select Yes or No according to your preference for getting a physical PAN Card. But a physical PAN Card required charges. Enter last four digits of aadhar card and the father’s surname. Fill up all necessary details without any error and click the next button.
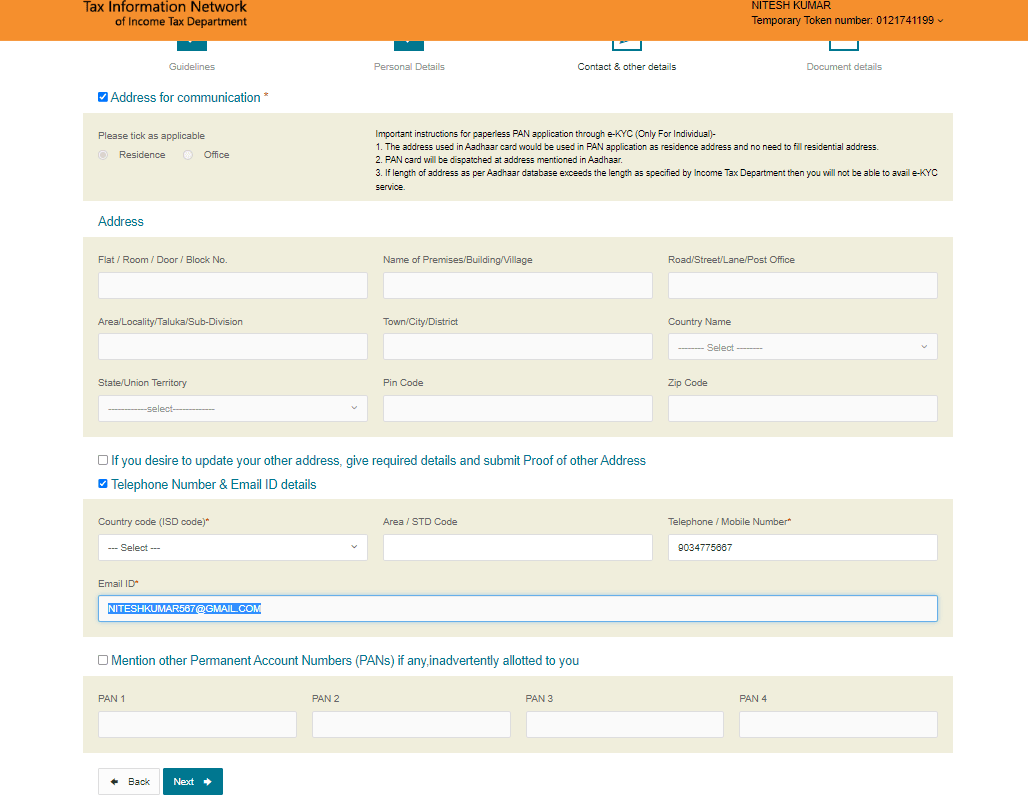
Step 6: On the next page, right-tick the telephone and email id details option. Enter the mobile number with the India ISD code and the email that you want to update. Then, click the next button. You have to fill out all the required empty fields, and this way, you have to complete all the pages that will appear one by one once you submit.
Step 7: Lastly, the interface will appear with a declaration form. Here, you’ll see an option with Proof of PAN, and you have to click it to select the No Documents part. After that, on to the Declaration form, you have to select himself/herself category, and your name will appear automatically on the above box.
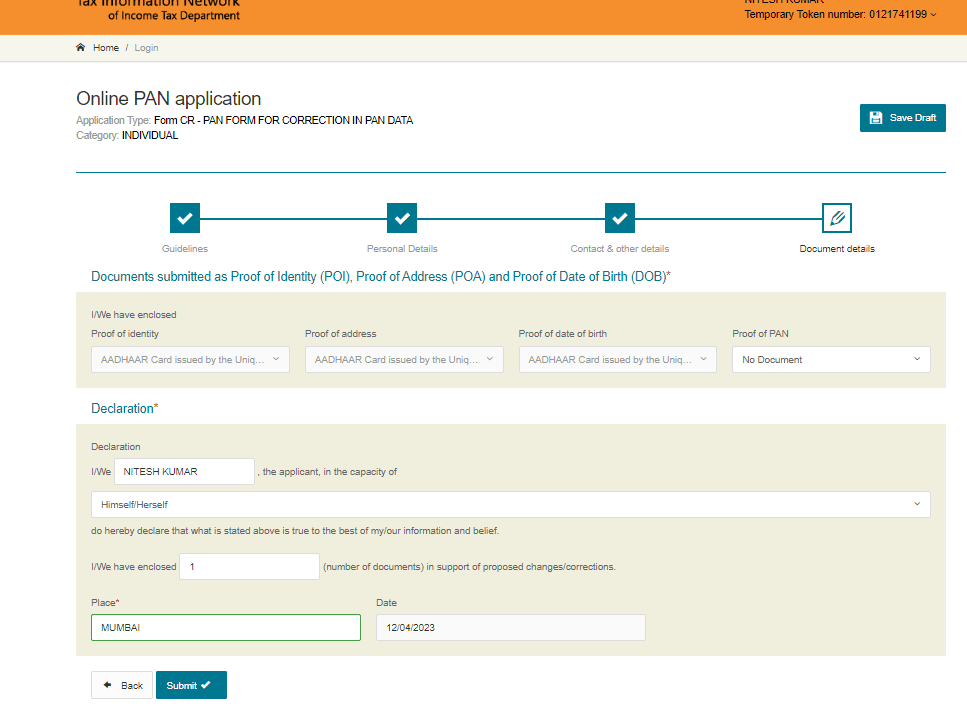
After that, you will be asked for the number of documents you are updating. According to that, put down 1 or 2. Then put the place name from where you are applying for the updation. Now, click on the final Submit button.
Once you click over the Submit, your Application is Submitted write-up will appear. Herein, you only have to put down your Adhaar card’s first 8 digits. Besides, you can simply go through the data you have given to recheck if any errors are found.
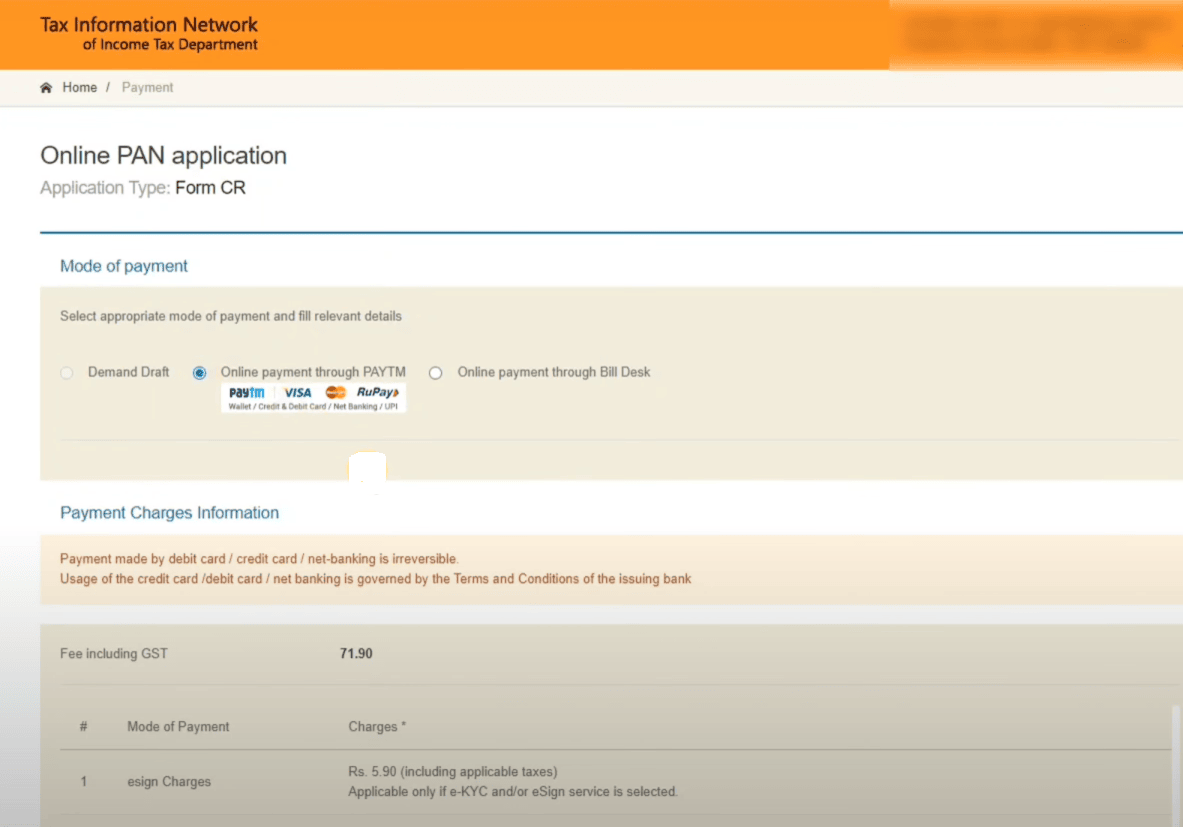
Step 8: This whole process will take a certain amount that will be given on the official website. You can only choose your transaction method and Process to Payment. You’ll be able to confirm the payment with the given transaction link. You can see here all the charges that are included clearly.
Your process for Email Id updation in your PAN Card will be successful within 24 to 48 hours. You will get a notification message for the successful transaction. You need to keep it safe until any security purpose comes. This way, you can update your Email Id or Phone Number on your PAN Card.
 How to Update Mobile Number in Pan Card Online
 How to Update/Change Email ID in SBI Account Online
 How to Update Email id in PNB Online
 How to Change Address in Aadhar Card Online
 3 Ways To Change Date of Birth in Aadhar Card Online
How To Change Mobile Number in Aadhar Card Online
3 Ways To Change Date of Birth in Aadhar Card Online
How To Change Mobile Number in Aadhar Card Online
Be the first to comment