SBI YONO is an online digital platform through which the State Bank of India (or SBI) provides its customers with the simplest way to manage their finances according to their needs. UPI transactions, however, can be used for easy transactions, but an online banking facility is still needed.
You must know that there is a maximum UPI daily transfer limit from bank to bank between Rs.25,000 to Rs.1 lakh to a beneficiary. If you want to transfer a more significant amount than the UPI daily transfer maximum limit to a beneficiary, you can easily do it via SBI YONO. But before moving funds online, you will need to add a beneficiary and activate him in the banking system of Yono SBI.
What is Beneficiary in YONO SBI?
As far as banking terms are concerned, a beneficiary is an individual who receives funds from a finance-related transaction or a bank account. In simple words, you must know that a beneficiary is a recipient of the transferred funds from your bank account to others’ bank accounts.
For example, you want to transfer INR 1,50,000 to An acquaintance’s bank account. In this situation, your acquaintance is a beneficiary. The addition of a beneficiary in the SBI Yono application ensures your funds are accurately and securely transferred to the correct recipient.
But if in case you want to transfer your funds without adding a beneficiary in the SBI Yono, there are quite a few chances that your funds might be transferred to the wrong person’s bank account.
By adding a new beneficiary in SBI Yono, all the details related to the beneficiary’s account are verified by you, such as the recipient’s IFSC code, his bank account number, his name, his bank name, etc., so that this extra step can ensure you send your funds to the correct bank account.
Steps to Add Beneficiary in YONO SBI
In case you want to transfer funds to a friend or any other person or make a bill payment to a shopkeeper, or for any reason, you should have to add a beneficiary to your Yono SBI app. Here we will be providing you with complete information and will guide you through the below described some simple and easy steps to add a beneficiary in the SBI YONO app., such as:
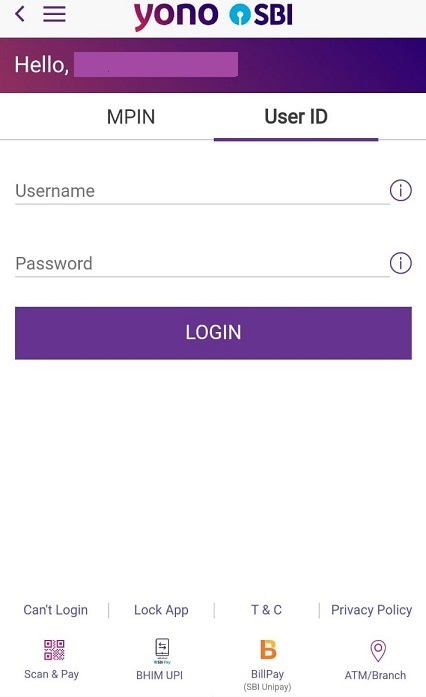
Step 1. Download, install, and launch the SBI YONO application from your mobile phone play store and open the app. Then enter all the necessary information to get logged in, such as your MPIN, User ID, Username or password, etc.
Step 2. A new page will open up before you after completing the logging-in process. Here you will see many options. Click on the “YONO PAY” option.

Step 3. Once done, a new interface will open up before you click on the “Bank Account” option.

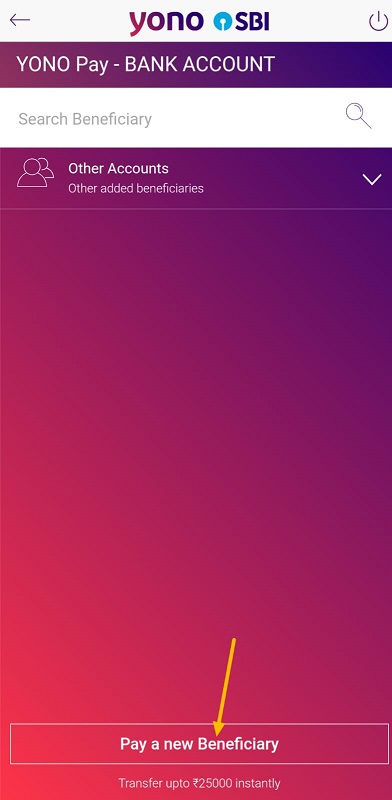
Step 4. After that, a new screen will open up before you, click on the “Other Accounts” option. After that, you will see a complete list of your beneficiaries on your mobile phone. Scroll down and reach the bottom of your mobile screen to find out and click on the “Pay a new beneficiary” option.
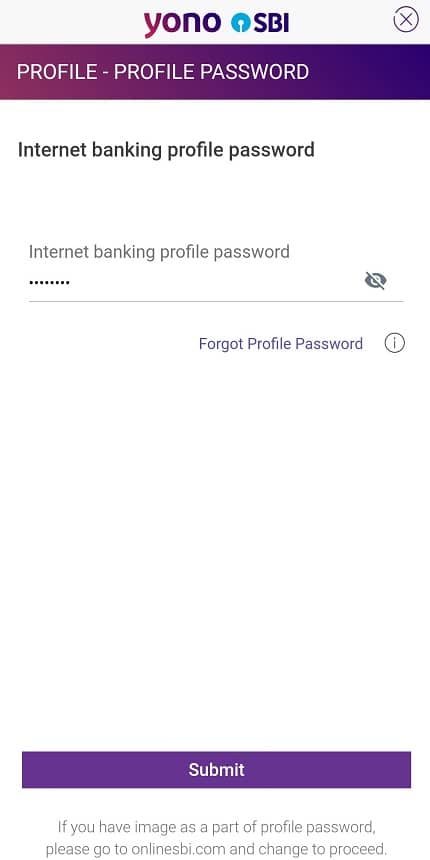
Step 5. Now, you will have to enter your Internet banking profile password. After entering the above password, click on the “Submit” button.
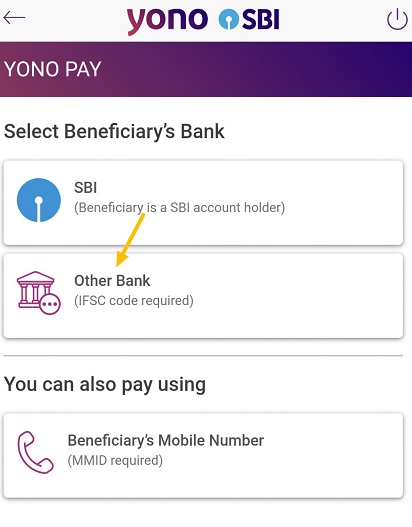
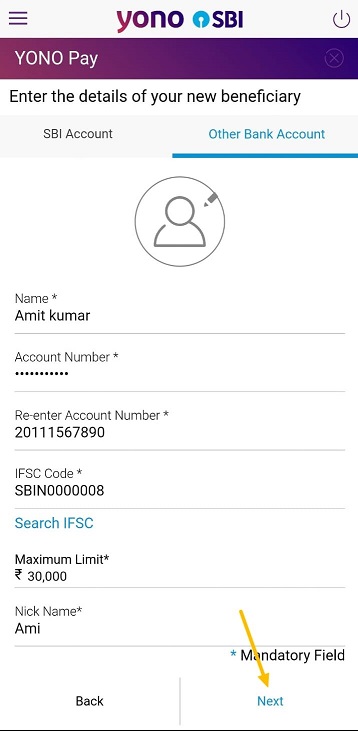
Step 6. After that, a new page will open up before you. Here you will see two options: “SBI” and “Other Bank.” If your beneficiary’s bank account is in SBI, click on the “SBI” option. And if it is in some other bank, click on the “Other Bank” option.
Step 7. Now, enter your beneficiary’s bank account details as required, such as his name, his bank account number, the maximum limit of the amount you can transfer to the beneficiary (for example, you can set INR 3,00,000 as your maximum transferable amount), and his nickname. Then click on the “Next” option.
Step 8. After that, a new interface will open up before you. Here you will see all your bank accounts linked to the SBI YONO and the available balance in each bank account. Select the bank account through which you want to transfer funds and enter the amount you want to transfer.
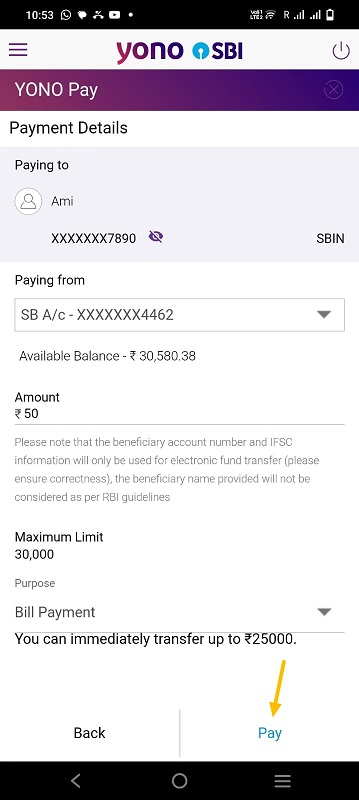
Now, a new interface will open up before you, where you will find a list of multiple purposes for transferring money. Select a reasonable purpose from the given list and write a remark to confirm the transfer of your funds. Then click on the “Pay” option.
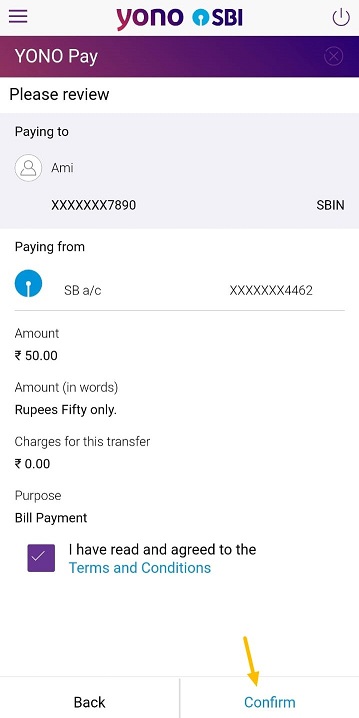
Step 9. After this process, you will be asked to review the transfer of money. If you find everything is OK, then click on the “Confirm” button.
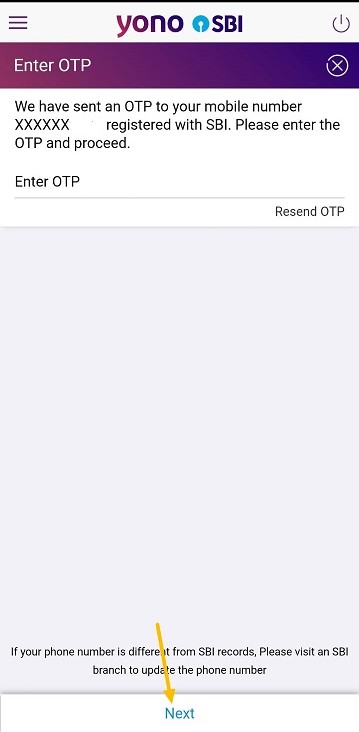
Step 10. Now, you will receive an OTP on your mobile phone. Enter that OTP as required. Then click on the “Next” option. After that, you will receive a message on your mobile phone “Transaction is successful.” Click on the “OK” option.
Now, you will see that the name of your beneficiary has been added to the “SBI” or “Other Bank” category, as may the case be. So this way, you can easily learn how to add beneficiaries to the SBI YONO application.
The Concluding Thoughts To Remember
Hopefully, this article helped you to have quickly learned to add a beneficiary and activate him in the banking system of SBI YONO. And now, you can realize that this process can serve as some extra security measures, such as preventing any online scams from reducing potential risks associated with unauthorized transactions and also preventing any chance of a fraudulent transaction from your bank account.
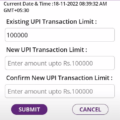 How to Increase UPI Limit in SBI YONO App
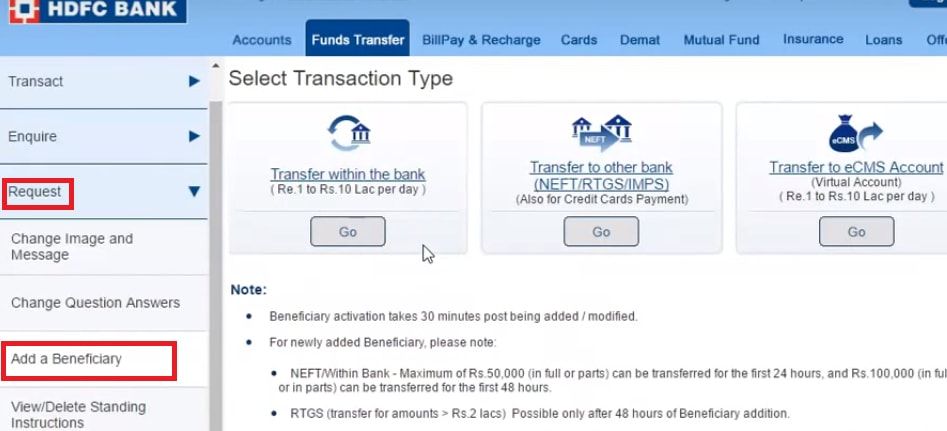 How To Add Beneficiary In HDFC Bank Online
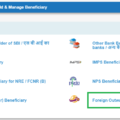 How To Add International Beneficiary in SBI Online
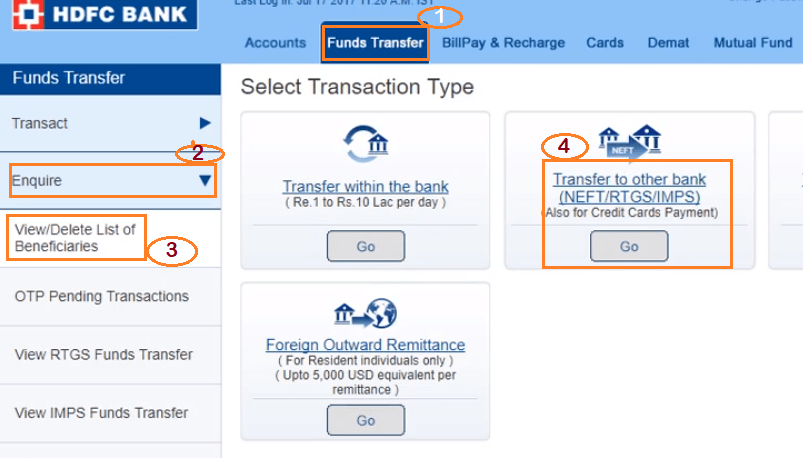 How To Delete Beneficiary In HDFC Bank Online
 Latest YONO SBI Money Transfer Limit Per Day 2024
 How to Add beneficiary in sbi online
Be the first to comment