As you walk into any store now, you’ll end up noticing a Google Pay QR code with the highest probability. In almost 7 years, this online payment system has gained major popularity. With 67 million active users, it comes with top-notch security.
If you want to make quicker transactions and are wondering how to add a bank account with Google Pay, this article covers it all. As a Tamil Nadu Grama Bank user, you need to follow some short steps to add an account with the UPI app. Note that all the following steps can be completed online and there’s no additional charge involved in it.
Steps to Add Tamil Nadu Grama Bank in Google Pay
Step 1. Go to the Play Store (for Android Users) or Apple Store (for iOS users) and install the ‘Google Pay: Secure UPI Payment‘ application. If you already have the application installed, simply open it. You need to have an active phone number while you link your bank account with Google Pay. Otherwise, the linking won’t be successful.
![]()
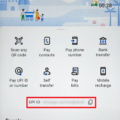
After you open the application, navigate to the top-right corner of the mobile screen. Click on the round-shaped profile button.
Step 2. Your name, phone number and photo will be visible on the next screen. Verify all the information displayed. If everything is matched, navigate to the below section: ‘Set up payment methods‘.
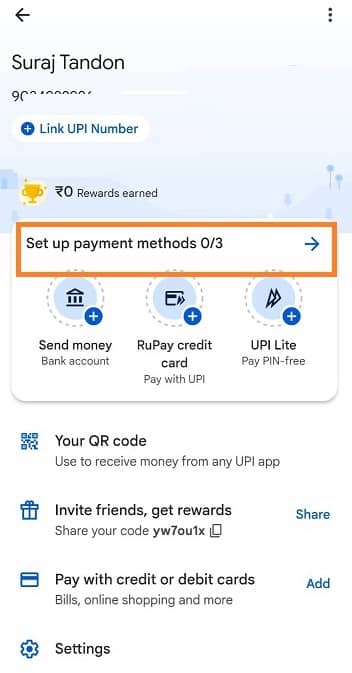
Step 3. Click on the ‘Add Bank Account‘ button to initiate adding Tamil Nadu Grama Bank in Google Pay.

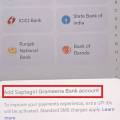
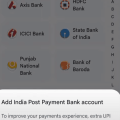
Step 4. On the next screen, all the bank names would be displayed under the ‘Select your bank‘ section. Scroll down or use the search bar on the top of the screen to find Tamil Nadu Grama Bank.
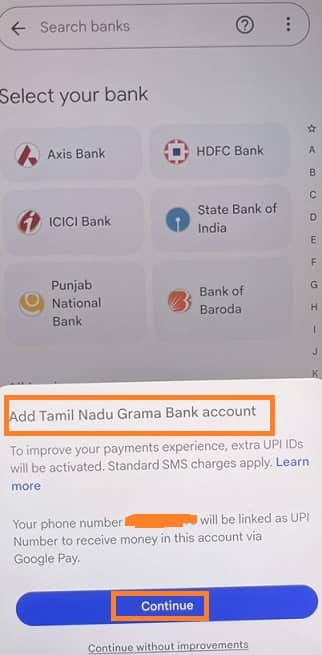
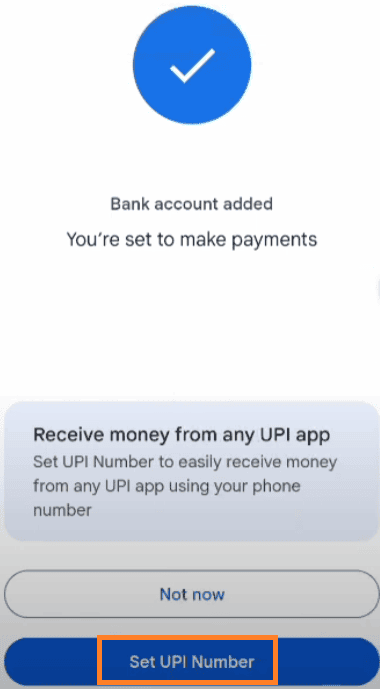
Click on the bank name and click on the ‘Continue‘ button. Make sure your bank account is linked with the same mobile number that is used for Google Pay. After automatic verification of your selected bank name and mobile number, you’ll be redirected to the next screen. A success message would pop up, displaying ‘Bank account Added. You’re set to make payments‘.
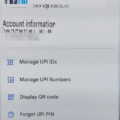
Step 5. Now click on the ‘Set UPI number‘ button.
Step 6. On the next screen, enter your Debit or ATM card number (12-digit number). In the next field, fill the card expiry date in a month-year format. You’ll find it on the Debit/ATM card.
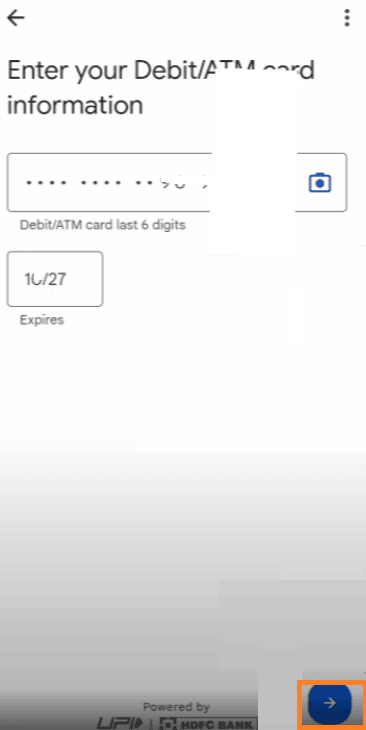
Click on the arrow button enabled on the bottom-right corner of the mobile screen.
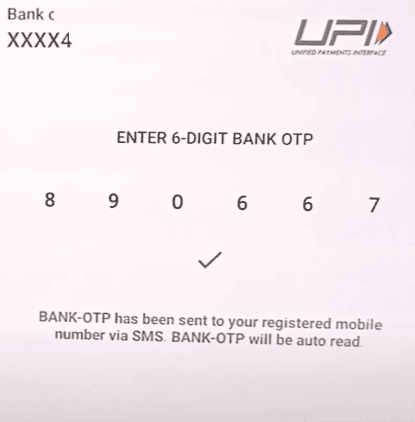
Step 7. An OTP (One Time Password) will be sent to your mobile number. OTP will be verified automatically. Otherwise, Enter that OTP and click on the tick button available in the bottom-right corner of the screen.
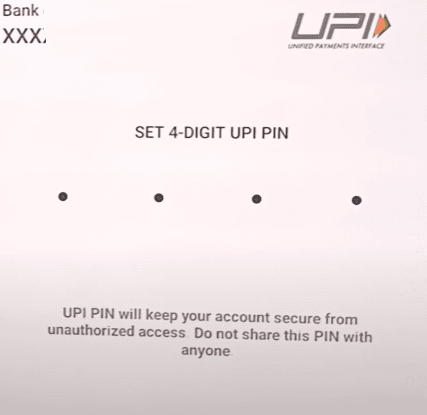
Step 8. Again click on the tick button available on the bottom-right corner of the screen. To set your UPI PIN, you can enter any 4-digit or 6-digit number and click on the tick button available in the bottom-right corner of the screen to submit. This PIN will be required whenever you use this UPI app for any transaction. So, note this PIN and don’t share it with anyone.
Re-enter the PIN to confirm and click on the tick button available on the bottom-right corner of the screen. A success message would be displayed.
To check if the PIN is working, scroll down from the home screen of the application and click on the ‘Check Bank Balance‘ section. Enter the new PIN you set, and check your current bank balance.
Conclusion
Linking your Tamil Nadu Grama Bank with Google Pay would make it very feasible for quicker transactions, online bill payments and recharges. If you already linked Google Pay with any other bank account, you can still be able to link it with Tamil Nadu Grama Bank.
All you need to make sure is that the same phone number is linked to the bank account as well. Also, in this case, the same UPI link would work for multiple linked accounts. You won’t be required to create a new one. Keep all these points while using Google Pay and you’re good to go!
 Tamil Nadu Grama Bank Balance Check Number
 How to Add Saptagiri Grameena Bank in Google Pay
 Pallavan Grama Bank Missed Call Balance Enquiry Toll Free Number
 How To Add IPPB Account in Google Pay
 How To Check Bank Account Balance in Google Pay
 How to Fix Google Pay Your money has not been debited Problem
 3 Ways To Find Your UPI ID in Google Pay
Be the first to comment