Whenever you buy a new SIM card, you are required to register your email ID in it. Or, if you forget your existing email ID, you will also have to register your email ID once again. You should know that when you find yourself in some problems, such as a wrong transaction or failed transaction or applying for an eSIM or some other issues, your registered email ID plays a vital role at that time.
Because whenever you will mail your problems through your registered email ID to Airtel customer care, you will get a faster response, and a direct case ID will be created. However, they will not register any case ID if you don’t have a registered email ID. As a result, you will receive a message, “Pl. register your mobile number with your email ID.”
If you use an Airtel SIM card, you should know the way to register your email ID in Airtel online. In this article, we will discuss and share everything in this regard. Just keep reading this article till the end.
Steps to Register Email ID in Airtel Online
Suppose you are using an Airtel SIM card and don’t know your email ID for some reason. But now you are searching the ways to understand how to register an email ID in airtel. In such a case, by following some simple and easy steps and beneficial information as written below, you can easily learn its correct process, such as:
Step 1: First, download and install the Airtel Thanks app from your mobile’s Play Store. Create an account with your Airtel mobile number and open this application.
Step 2: After logging in to the application, you will find the primary interface. Here you will see details of your account, such as the balance data, balance validity, mobile recharge option, and more.
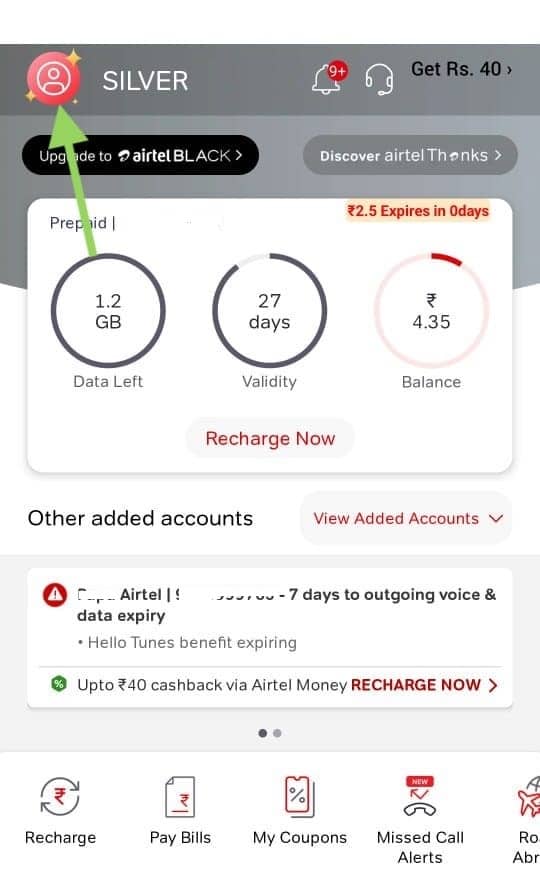
Click on the red-color profile picture icon at the top left corner of your mobile screen.
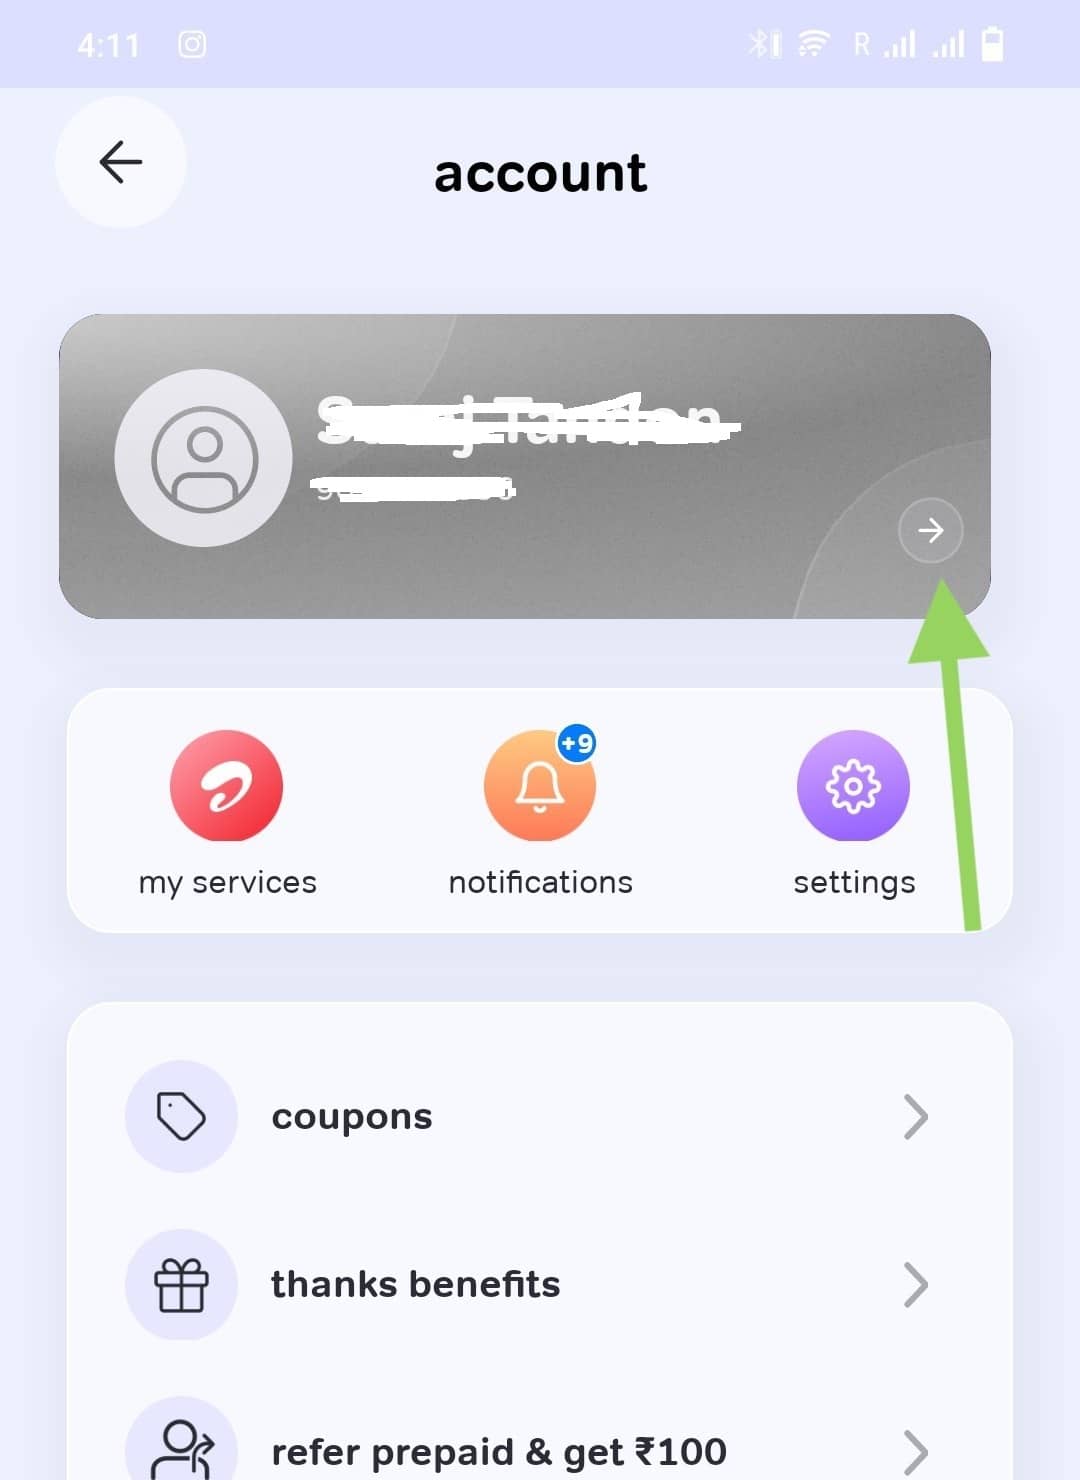
Step 3: Now, another interface shows you the account title. Here you will see your name and mobile number. Click on the horizontal arrow sign at the right side of your name.
Step 4: Now, a new page will open before you, showing you the Profile title. Click on the Edit option. After that, you can see many options here, along with your name, gender, date of birth, and email account, which is already added to your Airtel SIM card.
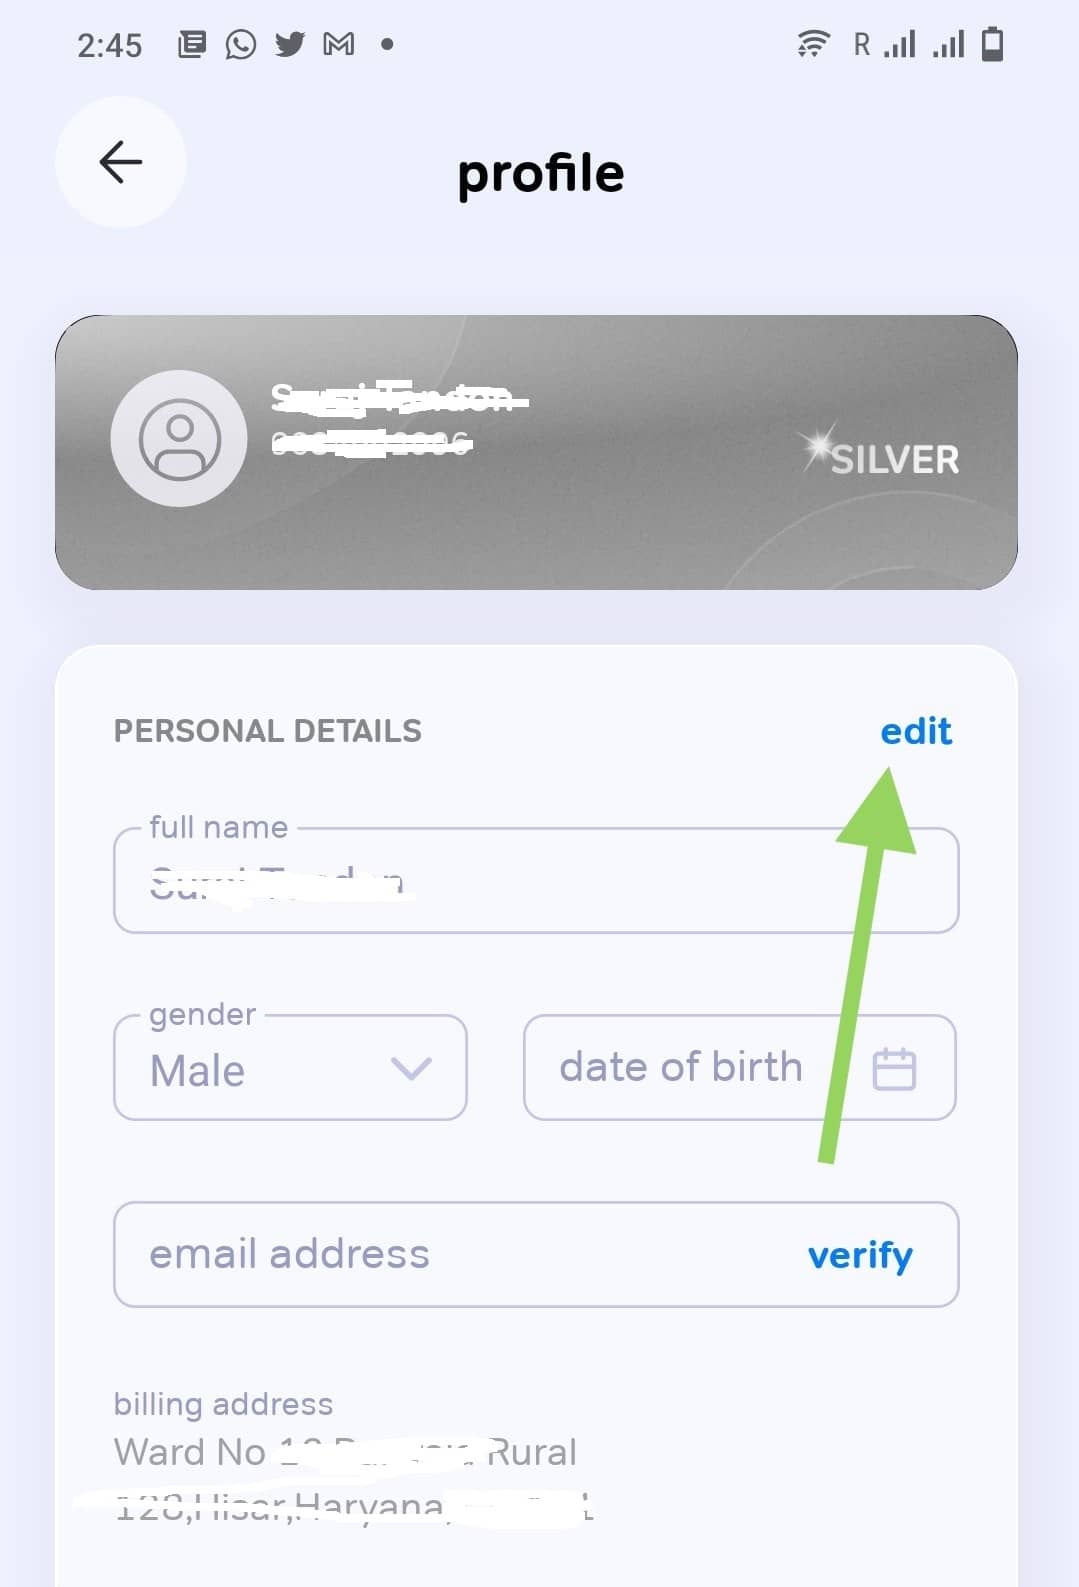
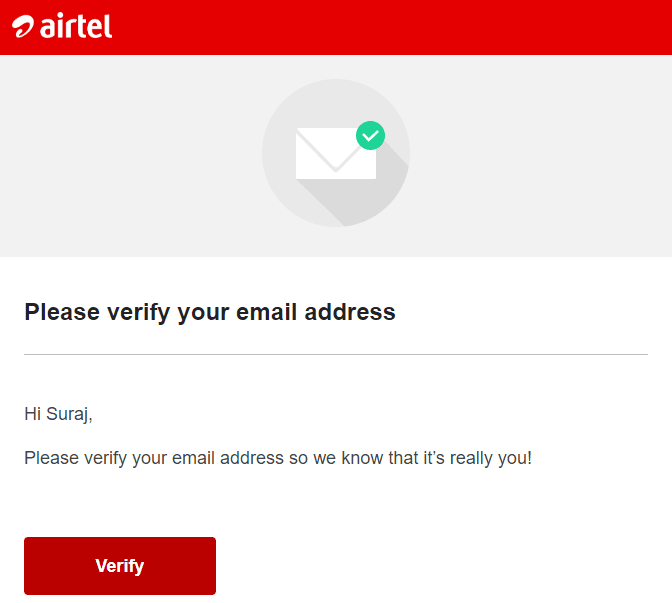
Note: If you have not added your email ID earlier, then you will not see your email account here, and you will have to enter your email ID in the given option box. Tap on the Verify option.

Step 5: Next, you have to click on send verification link option.
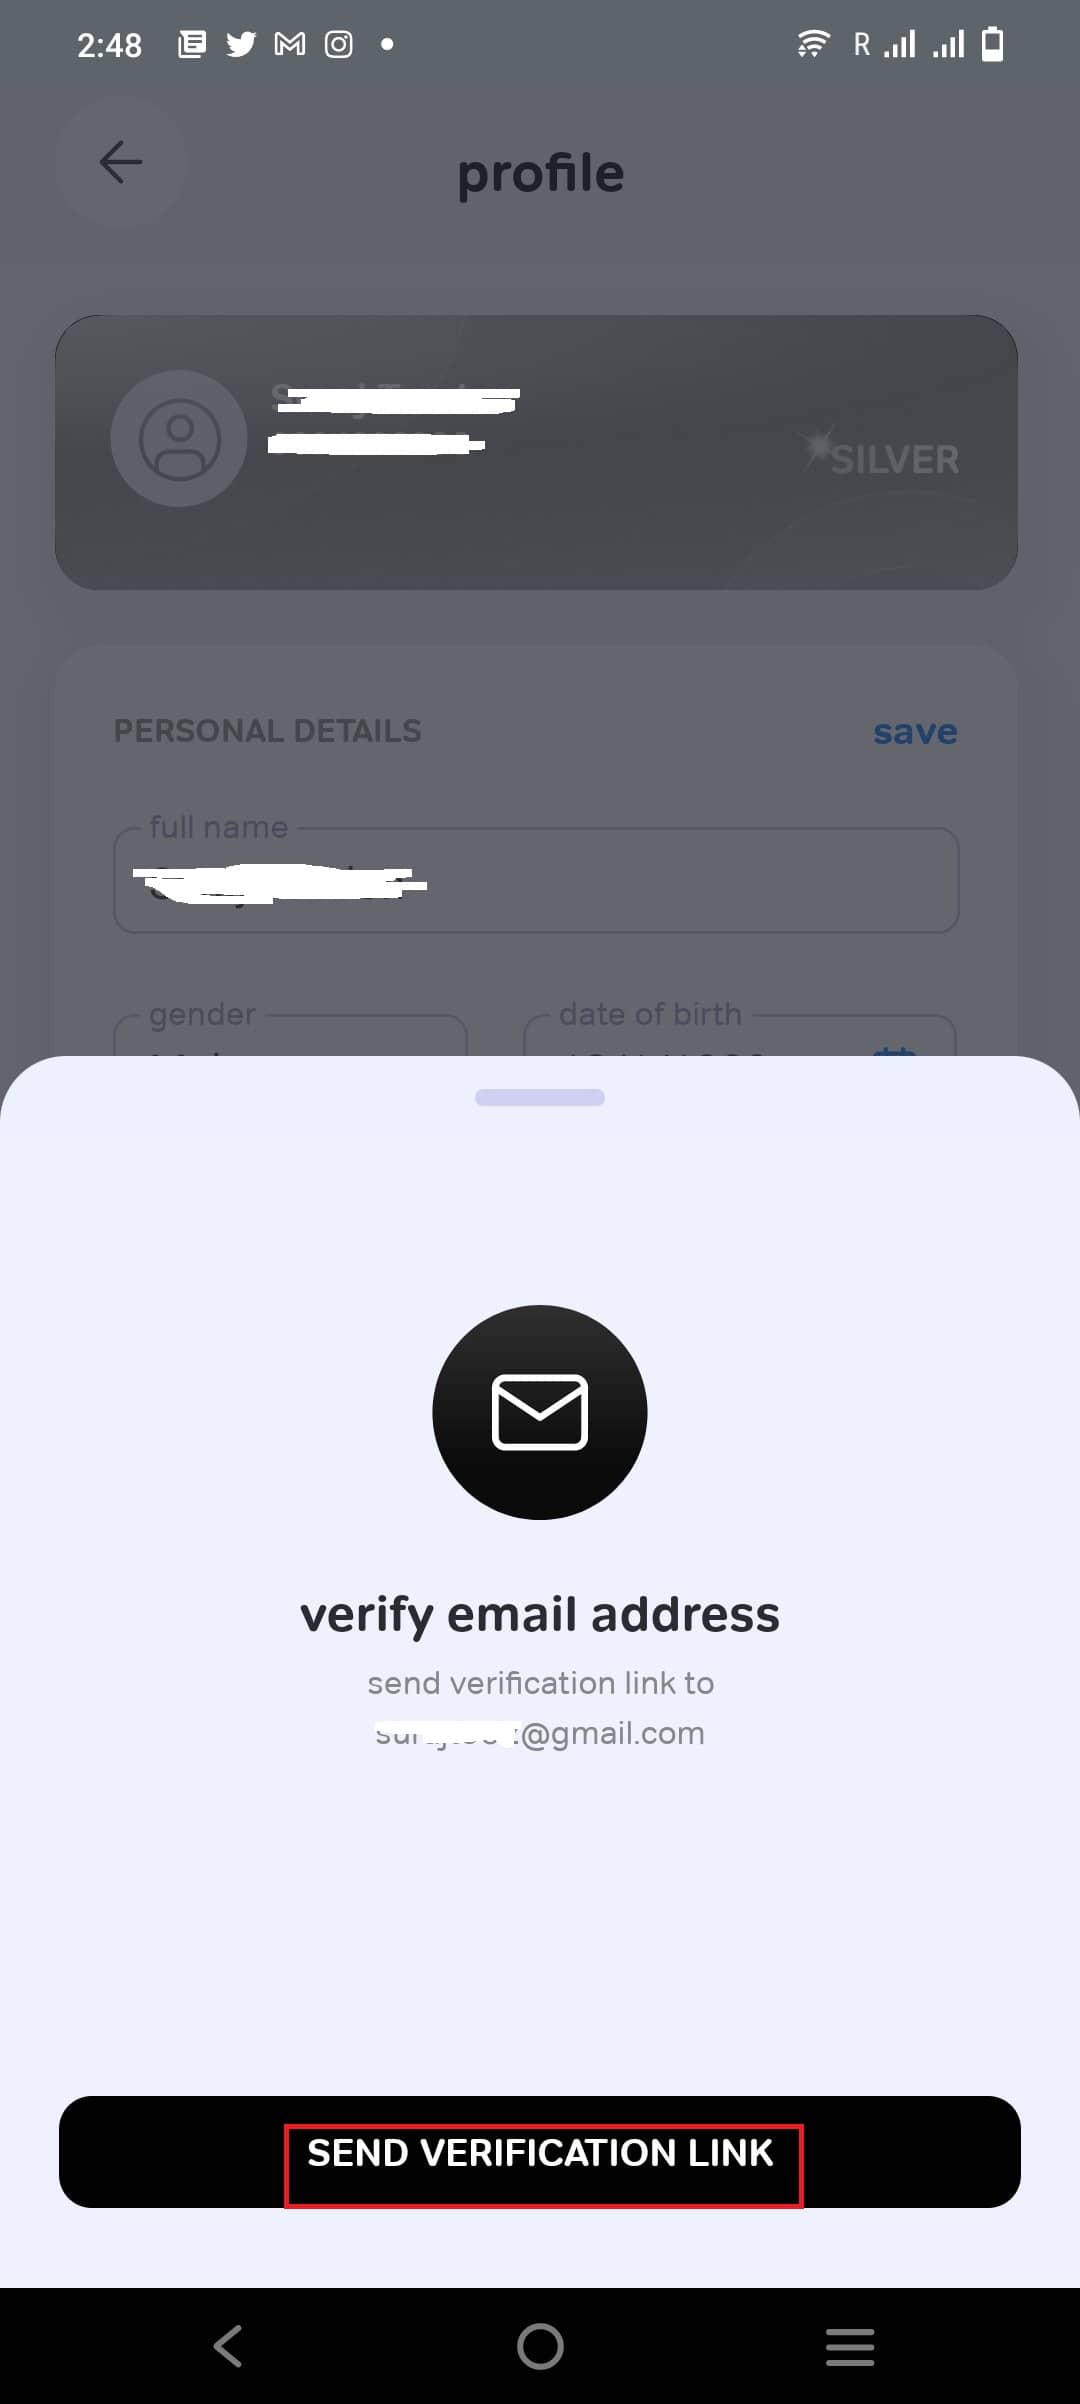
Step 6: Finally verification link will be sent to your email address. Click on the red verify button. After this, your profile will be updated, and your email ID will be added to the Airtel Thanks app.
So this way, you can easily add your email ID to the Airtel Thanks app.
Conclusion
Suppose you want to update your email ID in airtel, but you don’t know how to do it. In that case, we strongly hope that after carefully reading this article till the end and following the simple above-written steps, you will have successfully learned the necessary things so that now you can register your email ID correctly.
However, in case you face any difficulty, you should call Airtel Thanks app’s customer care service at 121 or 198 and inform them about your problems. After that, they will properly guide you to solve your problem.
| Services | Contact |
|---|---|
| Customer Care Number | 198 9810012345 for Postpaid 9810198101 for Prepaid |
| [email protected] |
You should know that when you update your email ID through your mobile number, you will regularly receive all the new offers. These offers include after-recharge information and much other useful information sent directly to your email account, which can be very helpful for you to avail of various facilities.
 How to Check Airtel Payments Bank Account Number and IFSC Code
 How to Open Airtel Payment Bank Statement PDF Password
 How To Register Email ID In Indian Bank Online
 How to Update/Change Email ID in SBI Account Online
 3 Ways to Close Airtel Payments Bank Account Online
 How to Update Email id in PNB Online
 4 Ways To Check Airtel FASTag Balance
How much time it takes to update email ID in Airtel
On behalf of the of costumer care office. please thanks.
How much time it takes to update email ID in Airtel
How much time it takes to update email ID in Airtel?
How to register email ID in Airtel Thanks app